
When I handled a camera for the very first time, I remembered feeling very intimidated. There were so many buttons and I simply didn’t know where to start. However, as I got more comfortable with the camera, I realised how fun photography was!
From curating simple memories to sharing your shots on Instagram, photography is truly a hobby for everyone.
However, if you’re more interested in filming and videography, check out this Singapore corporate videography company for more video production tips!
To breathe life into your photos, why not try adding some animation? You could animate still images by using a software or hiring an animation company to do it for you.
If you’re completely new to photography, there’s no need to worry as this article covers all the basic tips you’ll need to know!
Tip 1 – Work With The Camera You Have
Photography can be an expensive hobby but if you’re a beginner, just start with the camera you already have — your phone!
With your smartphone alone, you have access to a decent camera and a wide range of phone-editing apps at your disposal. While a digital camera lets you have more control and customisation, your phone’s camera is a worthy opponent as well.
Your phone’s camera is accessible and convenient, it’s perfect for taking pictures on the go! You don’t have to lug a heavy camera around and you can simply edit from your phone instead of connecting the camera to a computer. It’s also a lot more user-friendly and easy to learn.
Here are a few simple tips to help you take the best photos on your phone:
- Turn on grid lines (Read on to find out why)
- Avoid zooming in, get closer to the subject instead
- Make sure your camera’s focus is set on the subject
- Play around with different angles to get the perfect one
When you think it’s time to take your photography more seriously, you can consider investing in a digital camera to produce higher-quality images.
Tip 2 – Know The Three Pillars Of Photography
Know the three basic pillars of photography and you’ll be set for life! While you’ll come across more photography terms as you gain more experience, these three camera terms will be the most important.
- Aperture
- Shutter Speed
- ISO
Aperture
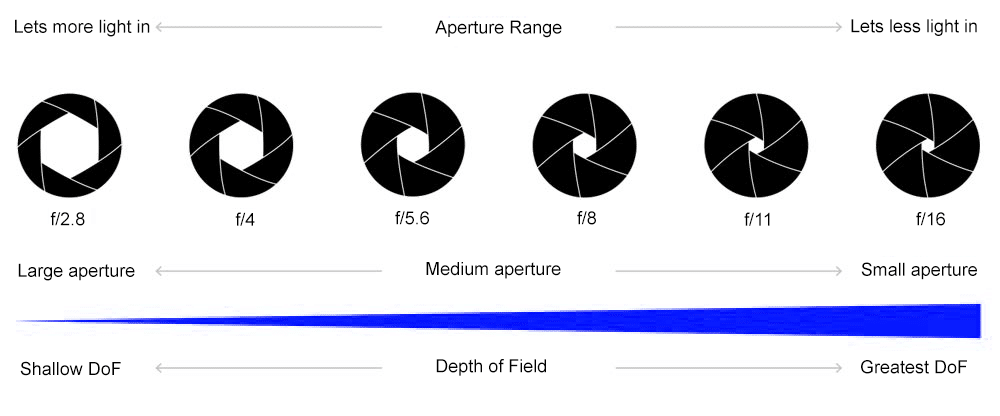
Your camera’s aperture is a hole at the back of the lens that allows light to enter. To allow more light to pass through, you widen the aperture and vice versa.
As more light passes through, your photos become brighter. If there’s too much light, your photos can become overexposed. Conversely, if there’s too little light, your photo might end up being too dark.
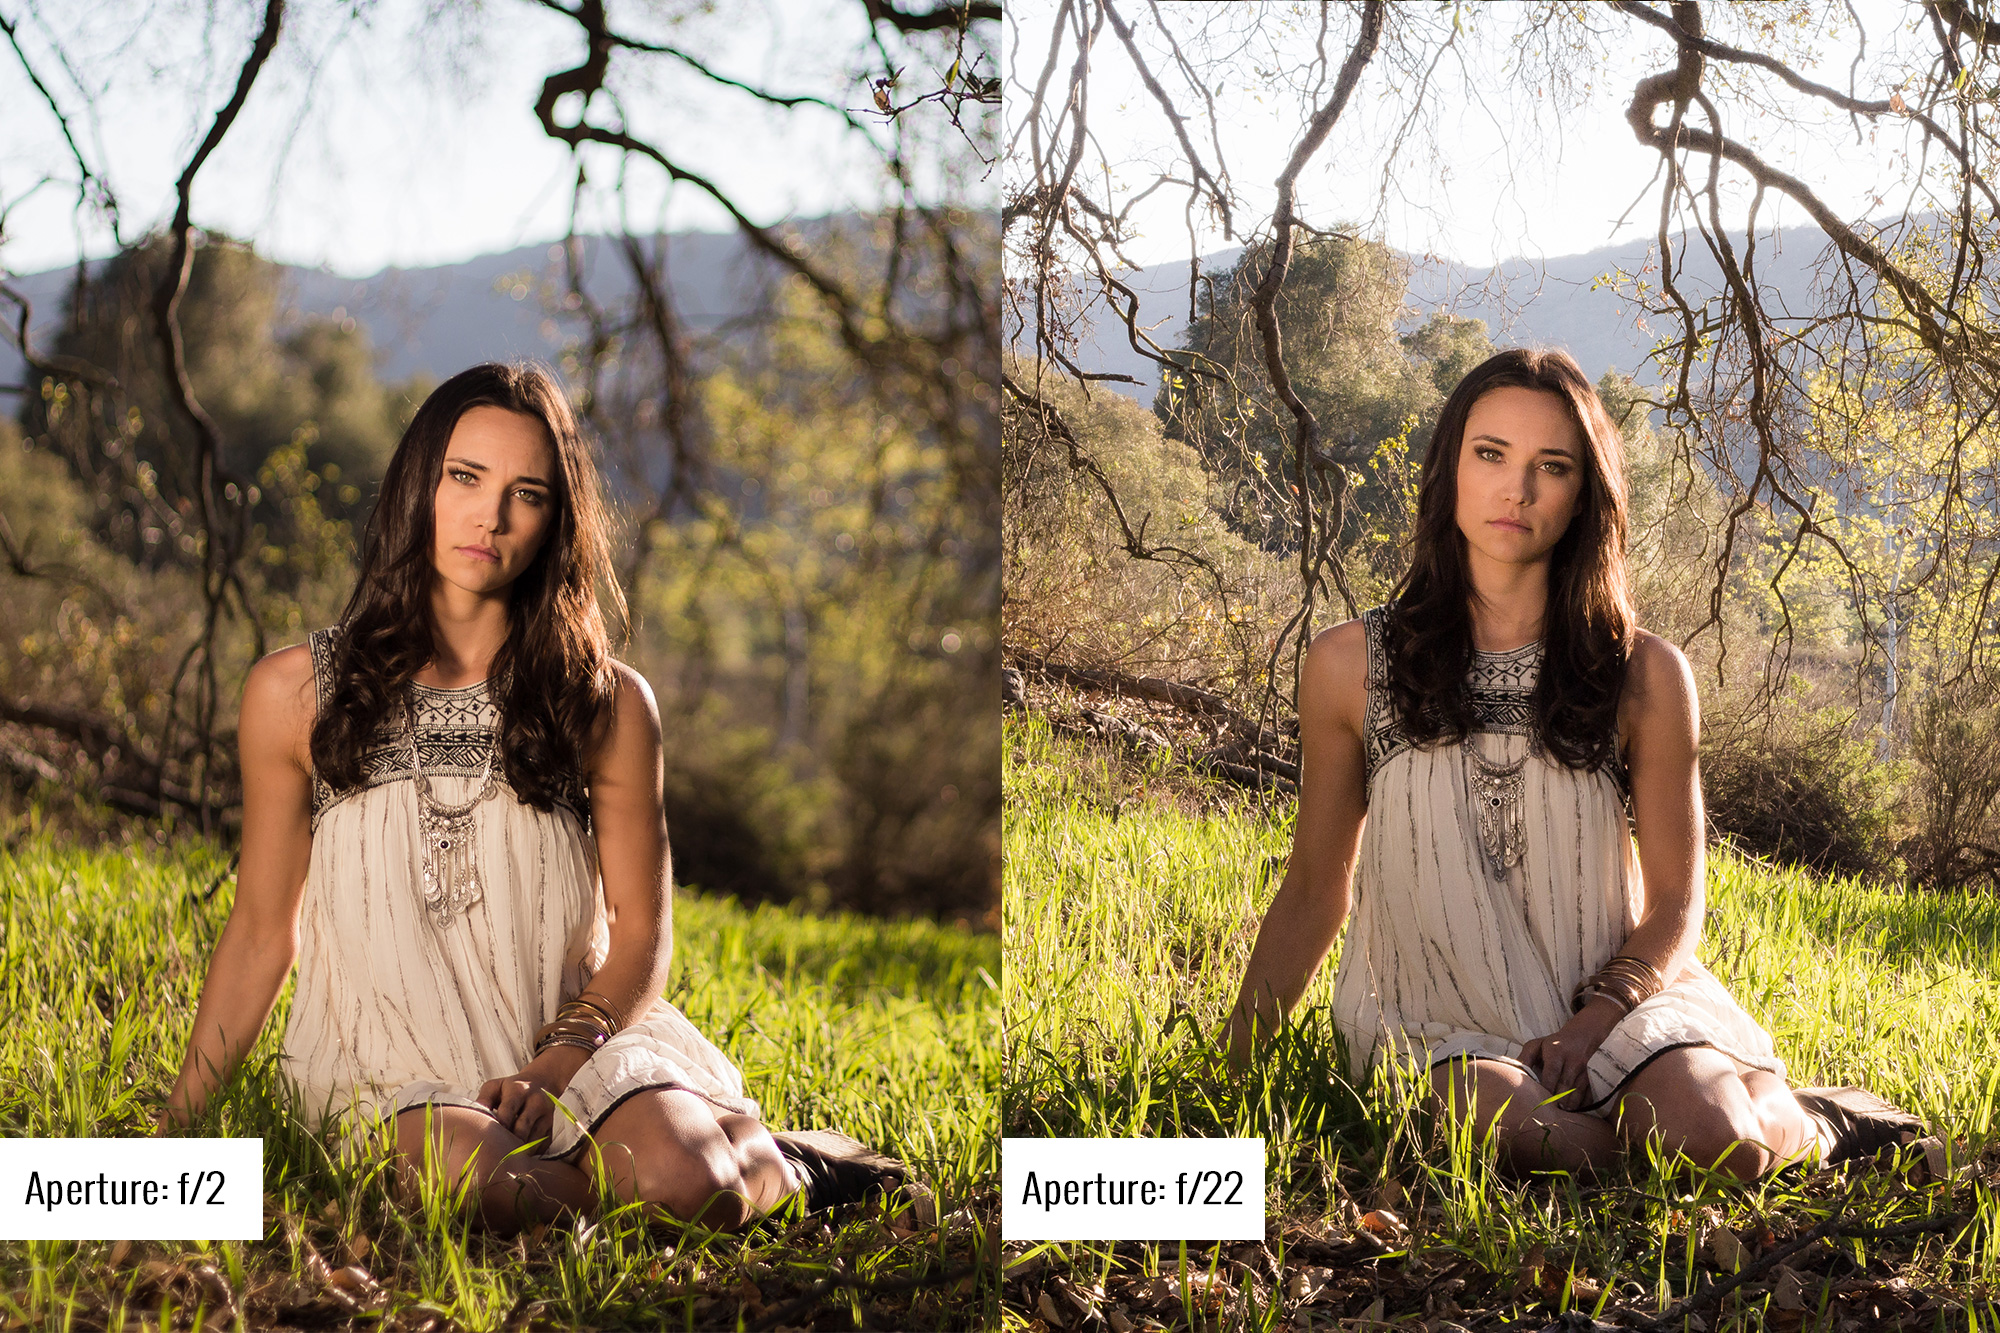
To change your aperture settings, you adjust the aperture value, which is marked by f-stops. With aperture values, numbers work backward. A wide aperture (which lets in more light) will have a smaller f-stop number, going as low as f/1.4. When the aperture is narrowed (which lets in less light), the f-stop number can increase up to f/22.
As you take more photos, learn how to use aperture priority. This basically means that you adjust the aperture manually instead of letting the camera automatically do it for you. So why should you do more work?
Aperture priority lets you control how much light you want in your images, which changes how much of the image is in focus, also known as the depth of field. While you think most of your image should be in focus, a shallow depth of field (when less of the image is in focus) can give more emphasis towards a subject.
Shutter Speed
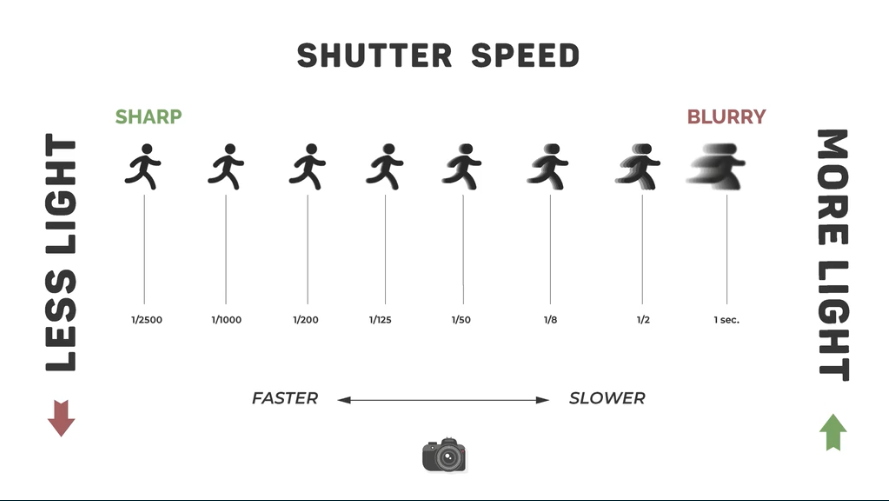
Shutter speed is the length of time that the camera’s shutter is left open. A higher shutter speed means the shutter is only open for short bursts of time, making it perfect for taking still images. However, it also means there’s less time for the camera to capture light, creating darker shots.
On the other hand, slower shutter speeds lets you take in more light but it also results in a blurrier picture. If your goal is to capture a motion blur then reduce the shutter speed.
ISO
ISO refers to the camera’s sensitivity to light. To absorb more light, increase your ISO. While this captures more light, it’ll also cause photos to turn out grainier. If that’s an aesthetic you’re going for, turn up your ISO. If not, try to change the aperture or shutter speed to absorb more light.

A good understanding of these three pillars will lead to a massive improvement in your photos.
Tip 3 – Pay Attention To Lighting

If you couldn’t tell, the three pillars of photography were all about adjusting light. Lighting is essential in photography and even mild differences in lighting can lead to dramatic changes. Different tones and shades of lighting help to set a different mood. A picture with warm lighting feels cozy while a picture with cool lighting can feel sleek and modern.
To start, you can try taking photos in natural lighting since it covers a broad spectrum. From a strong beam of direct sunlight to the soft diffused glow of the “golden hour”, natural lighting can be extremely fun to play with.
While there’s no clear-cut rule, try to avoid having too much light land on your subject as it can make the picture feel flat. In fact, having shadows in your picture can create more depth and be more flattering for your subjects.
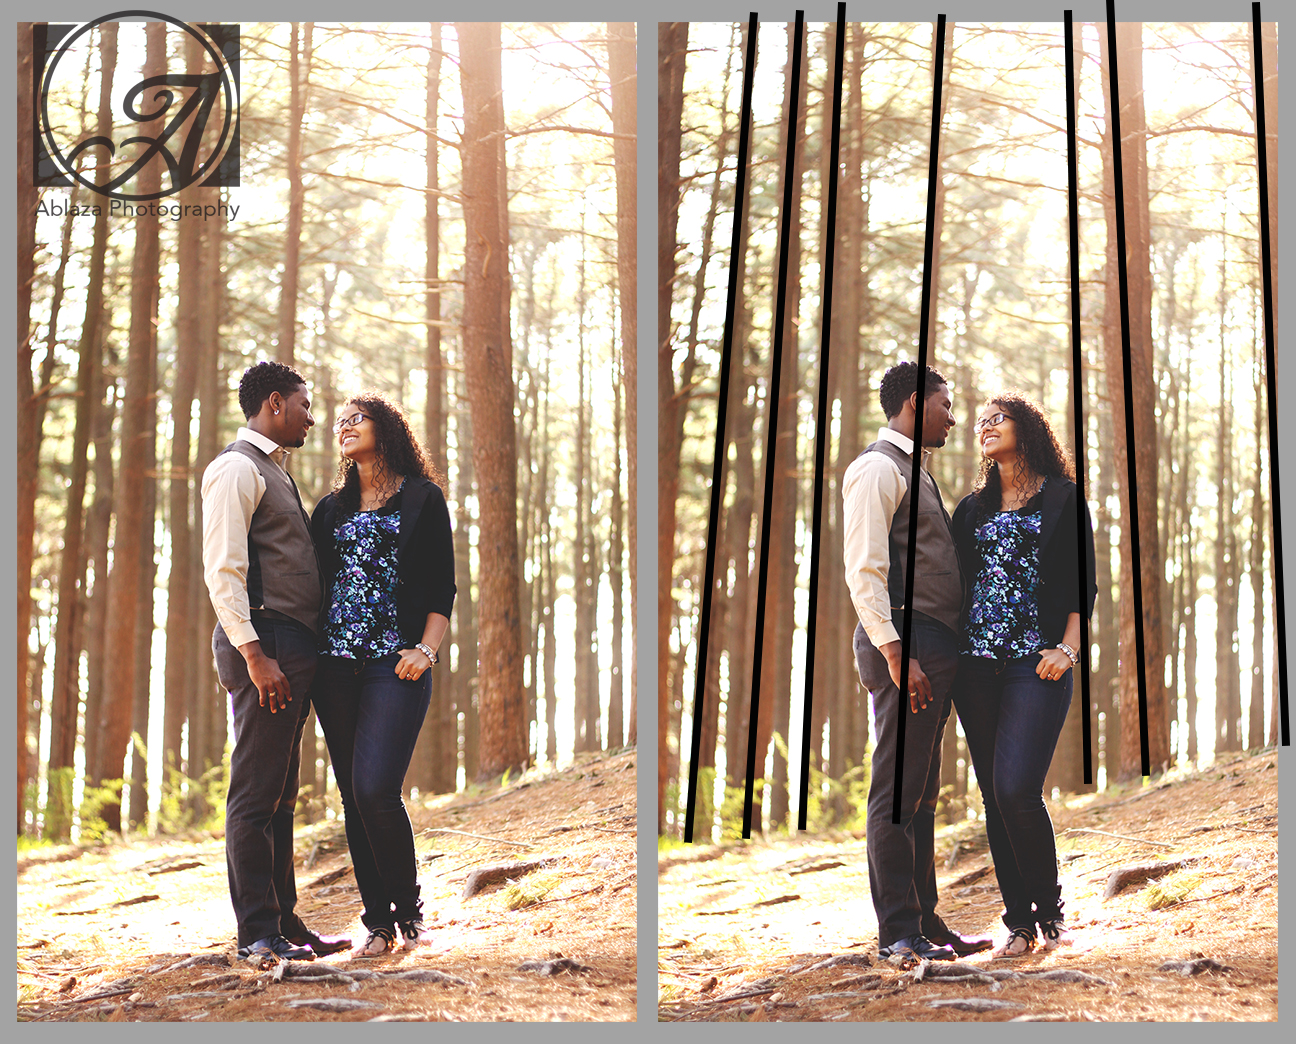
Tip 4 – Understand Basic Composition

Remember what I said earlier about turning on grid lines? Whether it’s on your phone or digital camera, all cameras have a setting to enable the grid lines.
Grid lines help you create a more balanced and well-composed image. Image composition refers to how the elements of your photo are arranged and if done correctly, your pictures will look more visually satisfying.
There are different types of grid lines but the most common one is “The Rule of Thirds”. This divides your photo into nine different grids. It shows you where the center of the photo is and lets you visualise where you should position your subjects. Line up your shot with the grids and you’ll never have to worry about taking slanted photos.
Tip 5 – Practice Makes Perfect
As you take more pictures, you’ll start to see which ones stand out from the rest. It’s extremely common to get mediocre shots and it’s important to not get disheartened by that. In fact, the stunning pictures you see on social media were most probably painstakingly selected from at least a few hundred shots.
As you make mistakes, take it as a chance to learn from them. Why did the photo end up looking bad? Was it the lighting? Or was it an issue with the composition? Try experimenting with different solutions like turning up your shutter speed or reducing the aperture.
Most importantly, remember to have fun!
Thanks for your continued love and appreciation for our media. We love to collaborate with brands and we love to get feedback from our readers. Did you check our platform “SocialMediaMomSG” for mompreneurs, local brands and ladies?
Drop a line on [email protected] / [email protected] or Click here to get in touch with us. Happy to connect!